 Matthias
Category listed:
Cards
Matthias
Category listed:
Cards
Coloring with colored pencils is a relaxing experience. The process of coloring is overwhelming. How to get started? What tools are needed? How much time should you take on each coloring page? We answer all these questions in this blog post. All about colored pencils and coloring techniques: follow our how-to color guide to introduce the basics of coloring. No matter if you search for adult coloring or techniques for kids.

Choose the quality of your colored pencils
the colored pencils are incredibly diverse. Not only based on the price. Cheaper coloring pencils have hard wax and less pigment. In most cases, you don’t reach bright colors while coloring. In addition to that, the resin from cheaper pencils can be uneven. That will lead you to white spots on the paper.
For a better result, choose more expensive but also softer and richer coloring pencils. The wax from such pencils has more pigment in the resin and is usually evenly spread on the paper, so you will avoid white spots or uneven tones while coloring. For beginners, it’s advisable to start with less expensive pencils until they get used to this process of drawing with those tools.
To get started, we recommend buying one bundle of pencils which includes different colors and types of colored pencils (hardness, soft). This way, you can try them all out before deciding which ones work best for your project and budget! Remember that there may be wax residue at the tip during initial use if using cheaper quality pens.
Choose an appropriate working space.
Make sure you use an appropriate working space – one where there are no distractions and is clutter-free, so it’s easier to focus.
As a preparation for the underground, we always try to use 2-3 sheets of paper below our coloring page we want to color. The results are much better when the underground is a bit softer. If you have one, you can also use a smooth cutting board to get the same result.
Choose a pencil sharpener with the right size for each colored pencil type (or use an electric one). If you are using liquid watercolors, it’s essential to have blotting paper to remove excess liquid when mixing colors. You can also make your own out of the toilet or kitchen tissue or old rag towels.
Make sure that the lighting is well attuned in your working space. If you’re using an old lamp, make sure to use a light bulb with the right type of fluorescent tube (color temperature). We use white-colored lights to get the best impression of the colors.
Most importantly, place your colored pencils in your working area. You can put your pencils in pencil-holders. You can set your pencils directly on the table. Find a way that fits your workflow the best. For me, it worked perfectly to use my pencil holder and have the colored pencils ordered by color scheme. With that preparation, I can switch colors very efficiently.
Create time limits per page
start with five minutes at first to get used to coloring within these boundaries. You can gradually increase this limit and feel comfortable with how much time should be spent on each coloring page. Remember that every type of colored pencil has its unique character, impacting, impacting, impacting color intensity/duration (e.g., number of layers). It’s a good idea to align the drying process of the colors with small breaks to increase flow and relaxation.
Color in small sections
It’s best to avoid coloring for long periods. It is better to take breaks and color small parts at a time (for example, one row of the page). This way, you can relax more than if you were working on large areas that require a lot of concentration. The only exception would be when using gouache or other water-based media where it may not dry before adding another layer.
Once your colored pencil has been blunted by pressing too hard against paper while coloring, there might be wax residue from the tip – use an eraser or tissue gently rubbing over the point until the film disappears!
Other Tips and Tricks for how to Color with Colored Pencils
Practice even Coloring
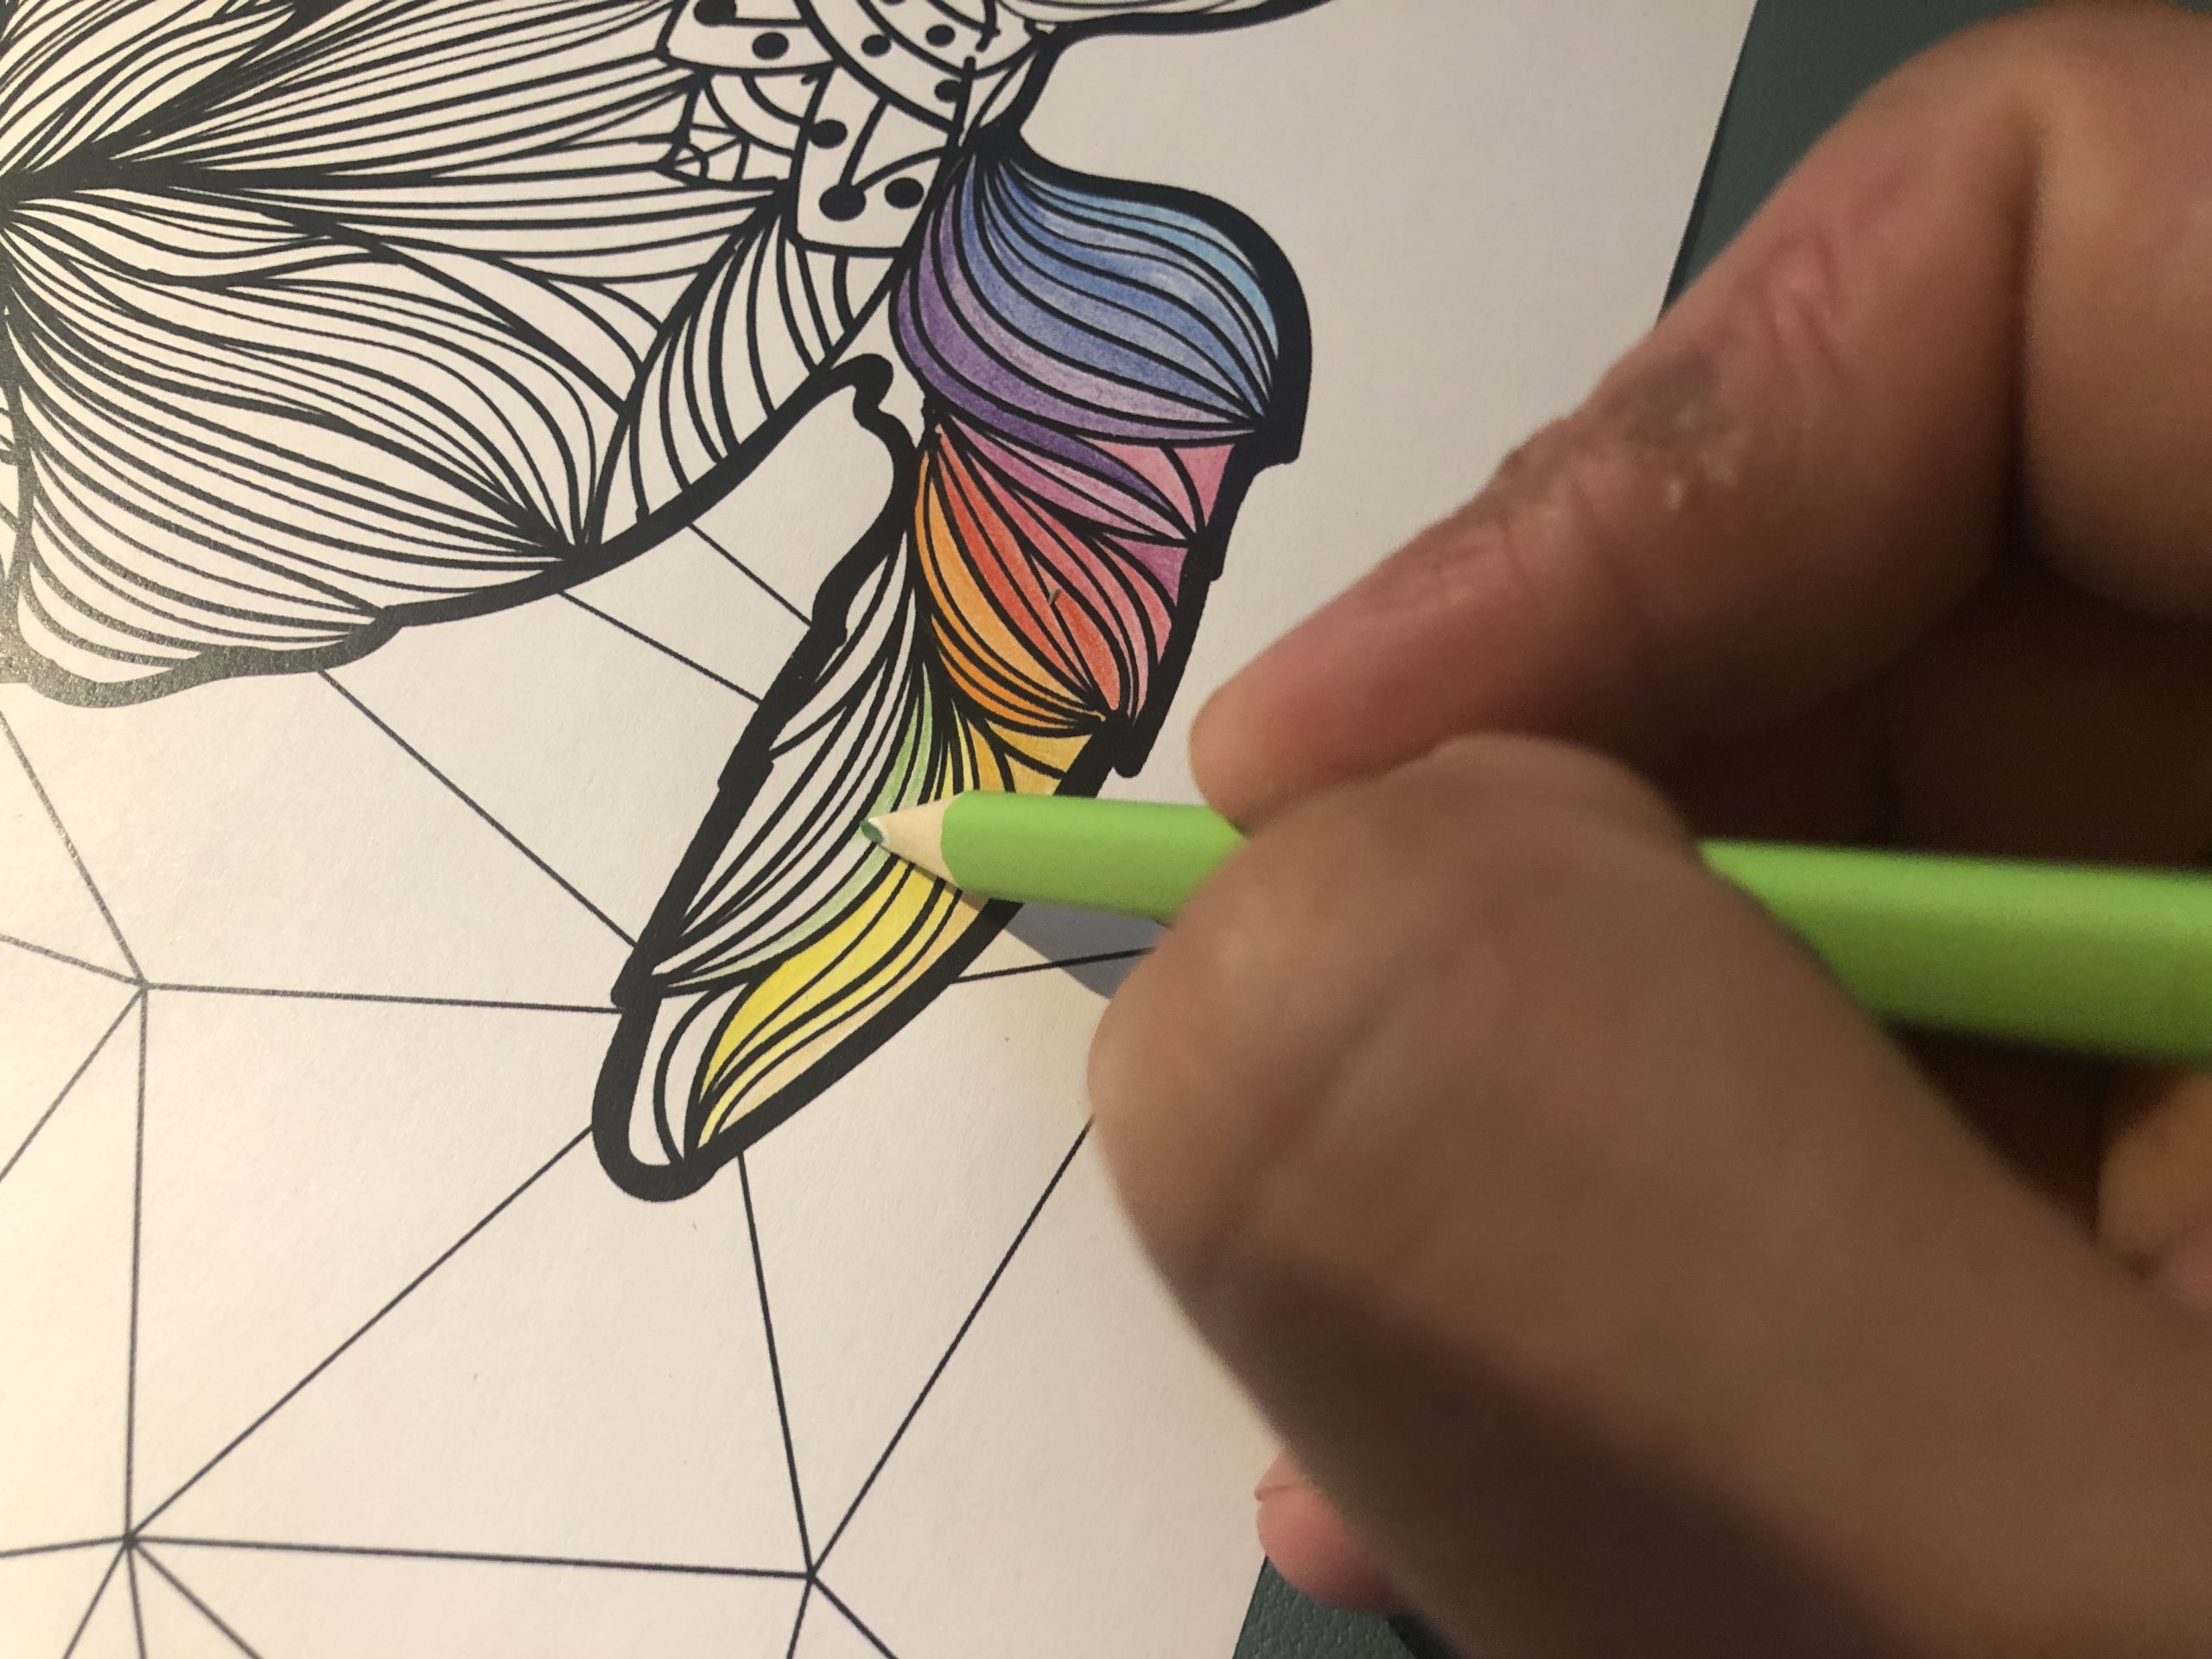
To achieve an even color, it’s essential to apply some pressure. For darker colors, push harder in the direction of your lines, so you work at higher speeds, and for lighter coloring, use less pressure, so you produce a much richer look. Many colored pencil enthusiasts make the mistake of applying lots of pressure when drawing. If you hold your hand in a way that pushes down on the tip, you’re likely to cause yourself an awful lot of grief – sharpening your leads and destroying your artwork’s finish as well as not having enough control.
When using colored pencils, try using less and even pressure and make small circular strokes to get a smooth finish.
Handle Bright Colors with layers and not with pressure
What does it take to achieve a darker hue of the color on the coloring pages? How do you get that shade and not accidentally bump up the pressure while coloring mess up your artwork? Changing your pencil angle by decreasing how hard you push can yield a lighter-hued outcome. Repeat this process with the same colored pencil to add another layer of color.
The process of adding multiple layers to your coloring can give it a smoother look by removing some of the white grain that was missed in the first layer. Here are some tricks to develop a quality finish with your colored pencils and how you should arrange things if you’re working on paper:
Applying additional layers will remove some unfinished color left in previous layers. Mix up the direction you lay out each layer so that all areas aren’t compressed similarly.
Sharpen your Pencils regularly
With a thin point on your tip, you have more control over your strokes.
Thin points are also good for small details and precision work, but beware of snapping the tip-off if you’re using too much pressure!
If your colored pencils become dull, try a sharpener with a fine point. You can use it to sharpen just one side to achieve more delicate shading effects when needed. This is especially useful in drawing hair or fur and ensuring that each strand has been shaded properly.
You’ll get an even sharper edge if you wet the lead before sharpening it (but be careful!) so give this process some trial and error until you figure out what works best for you personally.
With good quality pencils, it is easy to keep the tips sharp without losing much lead.
Good tools matter. Practice is more important.
Practice with solid colored pencils first, then move to higher prices pencils and papers. When you start with coloring pages, you probably are unsure how much money you want to invest in your tools? If you have a high budget from the beginning, you can go with high-priced pencils and paper. When you are not confident if coloring is a hobby you want to stay with, go with our recommendations in the list at the two of our articles. These sets are a good compromise between price and value. So, it does not hurt that much when you don’t want to go further with coloring pages. When you have a match as your new hobby, you would have your first set of good enough colored pencils to go ahead and practice.
From our experience and feedback from our users, it’s the most crucial part to get into coloring. It’s the practice. There is no shortcut to getting excellent results without taking the time. The best-in-class tools will not put you in a better position to have better results in your coloring. Just see it as an improvement in your practice journey to improve the overall quality of your coloring techniques.
How do you start adult coloring?
There is no exact answer to that. But, the most common one we can think of, would be having your set of colored pencils and a coloring book with intricate designs.
Practice makes perfect! Make sure you practice as much as possible by using different types of design pages from our gallery or just working on repeating patterns to improve the coloring techniques and skills needed for more complicated coloring pages. It’s also important not only to work on shapes (squares, circles) but also animal portraits. If you are starting out with pet illustration books, start practicing animals first before moving onto people’s faces or full-body figures which require more patience and precision than other subjects like landscapes or flower pictures do.
Do not set your expectations too high
It will only discourage you and make the entire process harder. Every new hobby or habit takes a while to show results and improvement. Your coloring techniques are no exception.
Practice coloring with pencils as much as possible regularly. Improving in smaller steps, but very regular can lead to huge improvements in the long run. I’ve you want to go deeper into training new habits or improve your habits, we recommend the book “atomic habits” by James Clear.
Moreover, we have many tutorials that might help beginners in mastering their techniques without any difficulties, but if you are still not sure or need further information about this subject we would be happy to answer your questions.
More tips and tricks for perfect coloring pages
Many people start out using wax crayons because they allow for quick blending between colors. They also do not leave behind tiny particles on paper like regular pens which can ruin the design later on when applied too heavily or blended aggressively.
If you are a beginner, I recommend using a simple coloring book to practice your techniques without the need for any prior skill set. For all other tips and tricks on how to perfect pages in different ways, have a look at our tutorials section!
More Tips and Tricks for perfect coloring results: You may notice that when blending two colors with wax crayons, there is often one color left behind more than the other which creates an uneven finish, especially if you don’t have time or patience. One way to get around this would be by holding both pencils at once to even out those lines. Another option would be using regular pens as they will leave fewer particles on paper because of their ink consistency.
Deep breathing is one of the most important parts of coloring. It will help you control your hand and keep it steady, as well as give you more patience. And remember that art takes time! There are no mistakes when using coloring pencils – even if there are red lines or smudges on the page. So don’t worry about those small imperfections because all artists go through them too!
A few other tips would be: use symmetry in your work to make everything look cleaner and neater; stick to a single color palette so that pages have unity; do some research before starting on a complex piece like an illustration
How can I make my color look realistic?
To get your coloring techniques to a realistic look you should have done some coloring books as your first trainings. You should also use a colorless blender to blend colors together to create smooth transitions. That will help you control your hand and keep it steady, as well as give you more patience. And remember that art takes time! There are no mistakes when using coloring pencils – even if there are red lines or smudges on the page. So don’t worry about those small imperfections because all artists go through them too! You must be aware of any symmetry (using one side for reference) so everything looks cleaner and neater; stick with a single color palette for each project, so that every page has unity; do some research before starting on a complex piece like an illustration. To get your coloring techniques to look realistic.
Focus on Shading in your coloring pages
- Use pencils that are close to the lightness or darkness of the color you want to achieve in your shading. This will give depth and complexity, not just one flat shade.
- Make strokes on both sides for soft shadows and highlights; start with dark colors first before adding lighter ones, so it appears more realistic when finished. And remember: only use ONE side of the paper as a reference!
Adding Texture to Your Coloring Pages
This can be done by using a dry brush technique, where some parts are lightly touched (or barely brushed) while others have pressure applied – this creates a texture that makes objects like hair or fur look more lifelike. Nail polish remover also works well at giving an interesting effect without the need for complicated textures.
A dry brush technique is also a good way to create interesting patterns and textures on clothing, trees, or other objects that you want to look different from the background – simply dabbing with very little pressure will leave some patches untouched while more heavily brushing over them will give it texture in the form of darker lines. The result looks like something between crosshatching (diagonal strokes) and stippling (tiny dots).
Other coloring Tips and Tricks
Practice drawing different kinds of lines (thin/thick) and strokes (curves/angles). Draw them at various lengths and speeds too – when portraying motion for example! This is also good practice for copying images from photos into small sketches that can be done quickly. Even though they take up less room than full-size drawings there still needs to be some variety in terms of line weight and width as well as how fast one draws each stroke or line type, so it looks like a motion illustration and not just a quickly drawn still image.
Practice filling in gaps or spaces with different colors to create depth on the paper. The one thing that will make your coloring look more realistic is having contrasting shadows, highlights, linear gradations of color from light to dark which is created by using pencils with various values (lightness/darkness). It might be helpful to keep a few shades at hand when you start out so that you can add these important details later if needed without hunting around for other colors while trying to finish up an illustration.
Did we miss some coloring tips?
Please send us your best tip when you’re getting started. There are many ways to take your coloring skills from novice to expert, and we’ve just about listed them all. Nevertheless, we are more than happy to add your tips and tricks to our how to color blog post.